
DIY Winter Paper Chandelier – Easy Craft for Seasonal Decor

This winter has been a long one so here is something to remind ourselves of the beauty that is around and also fun to make and enjoyable to look at. This craft is pretty simple and almost anyone can help in the process!
Instructions Winter Paper Chandelier
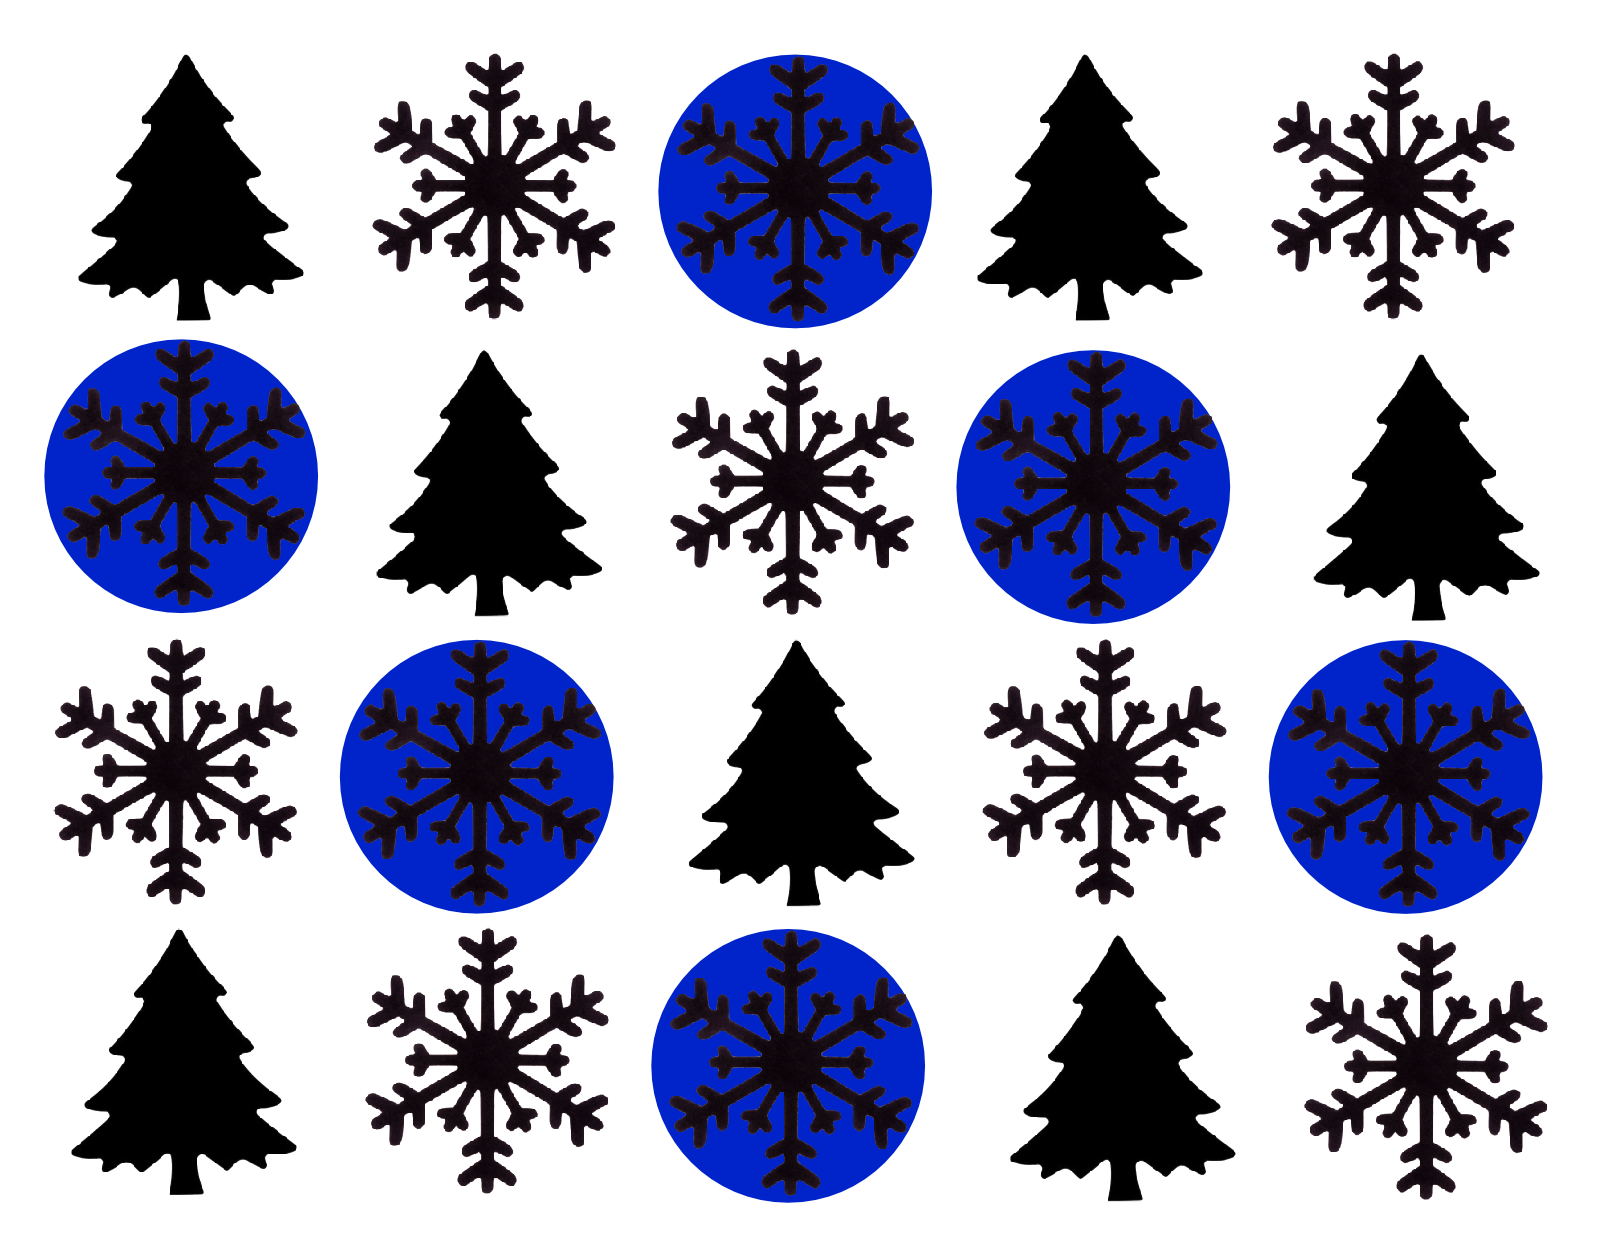
1. Start by die cutting your trees and snowflakes out. For the circular snowflakes I had used the normal die cut for the snowflakes and used a larger circle die cut around it.
2. Punch mini holes into the ends of the snowflakes and trees.
3. Align your snowflakes and trees into a pattern (I have a pattern that I used).
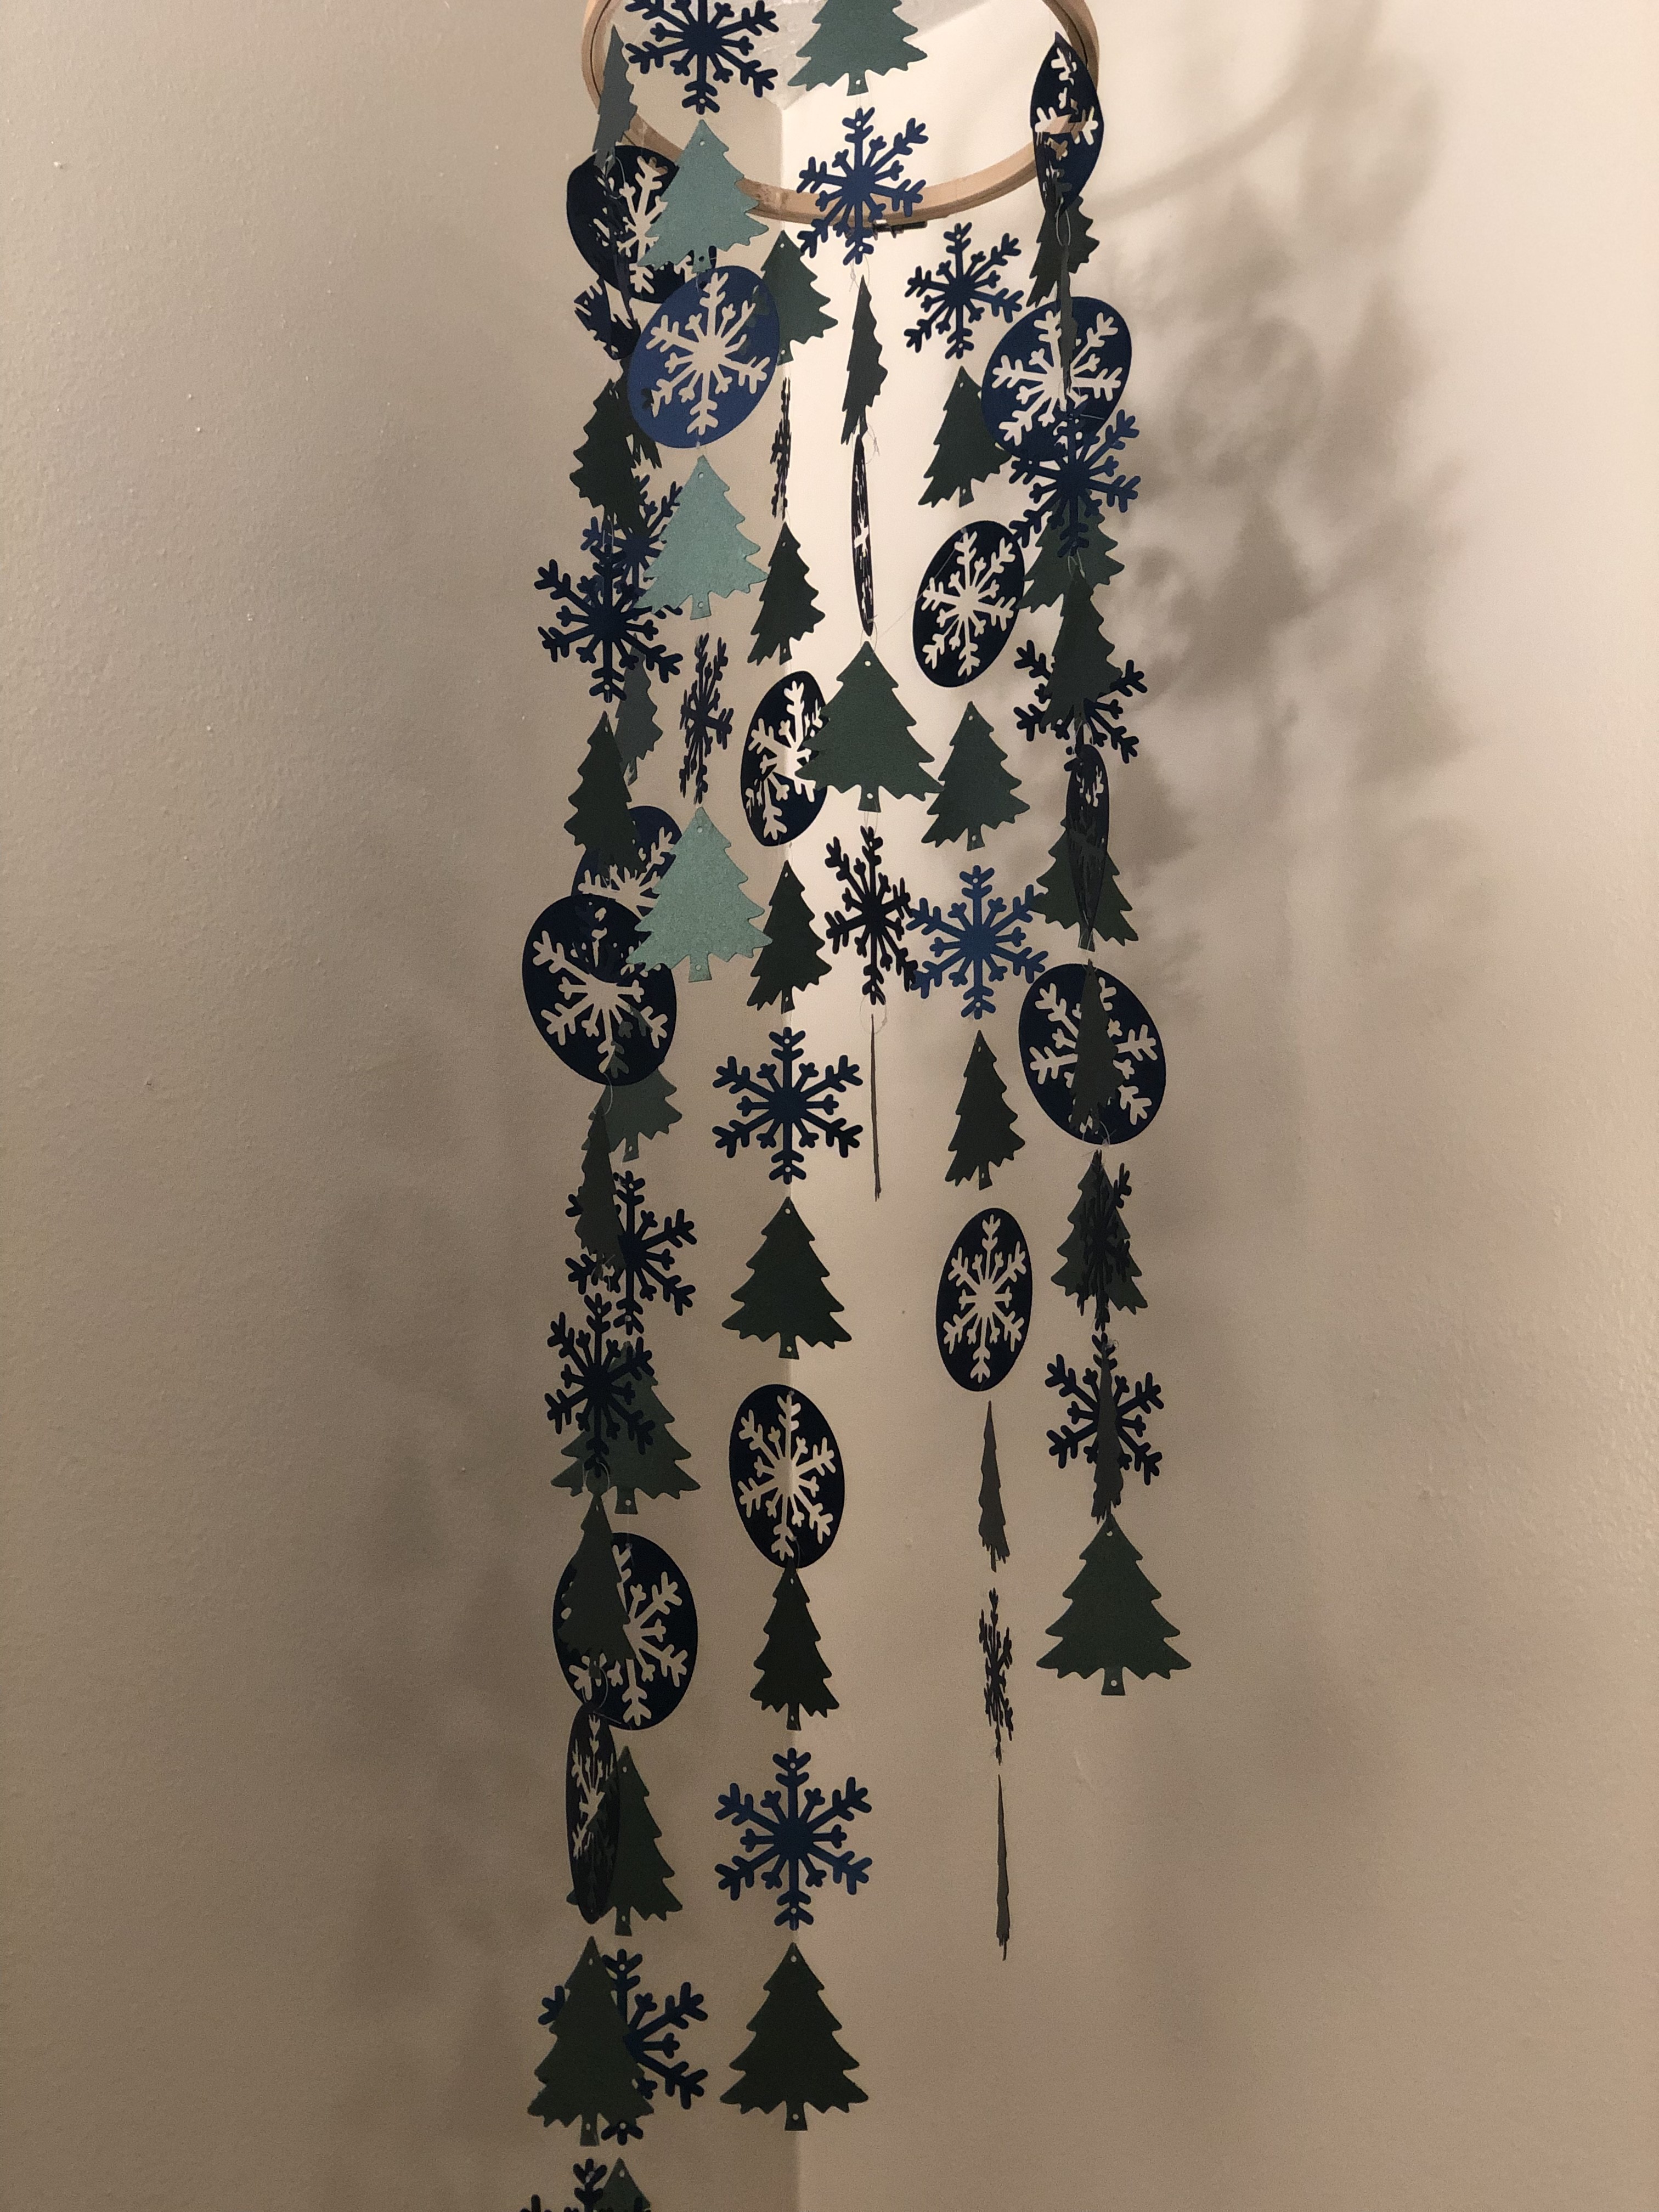
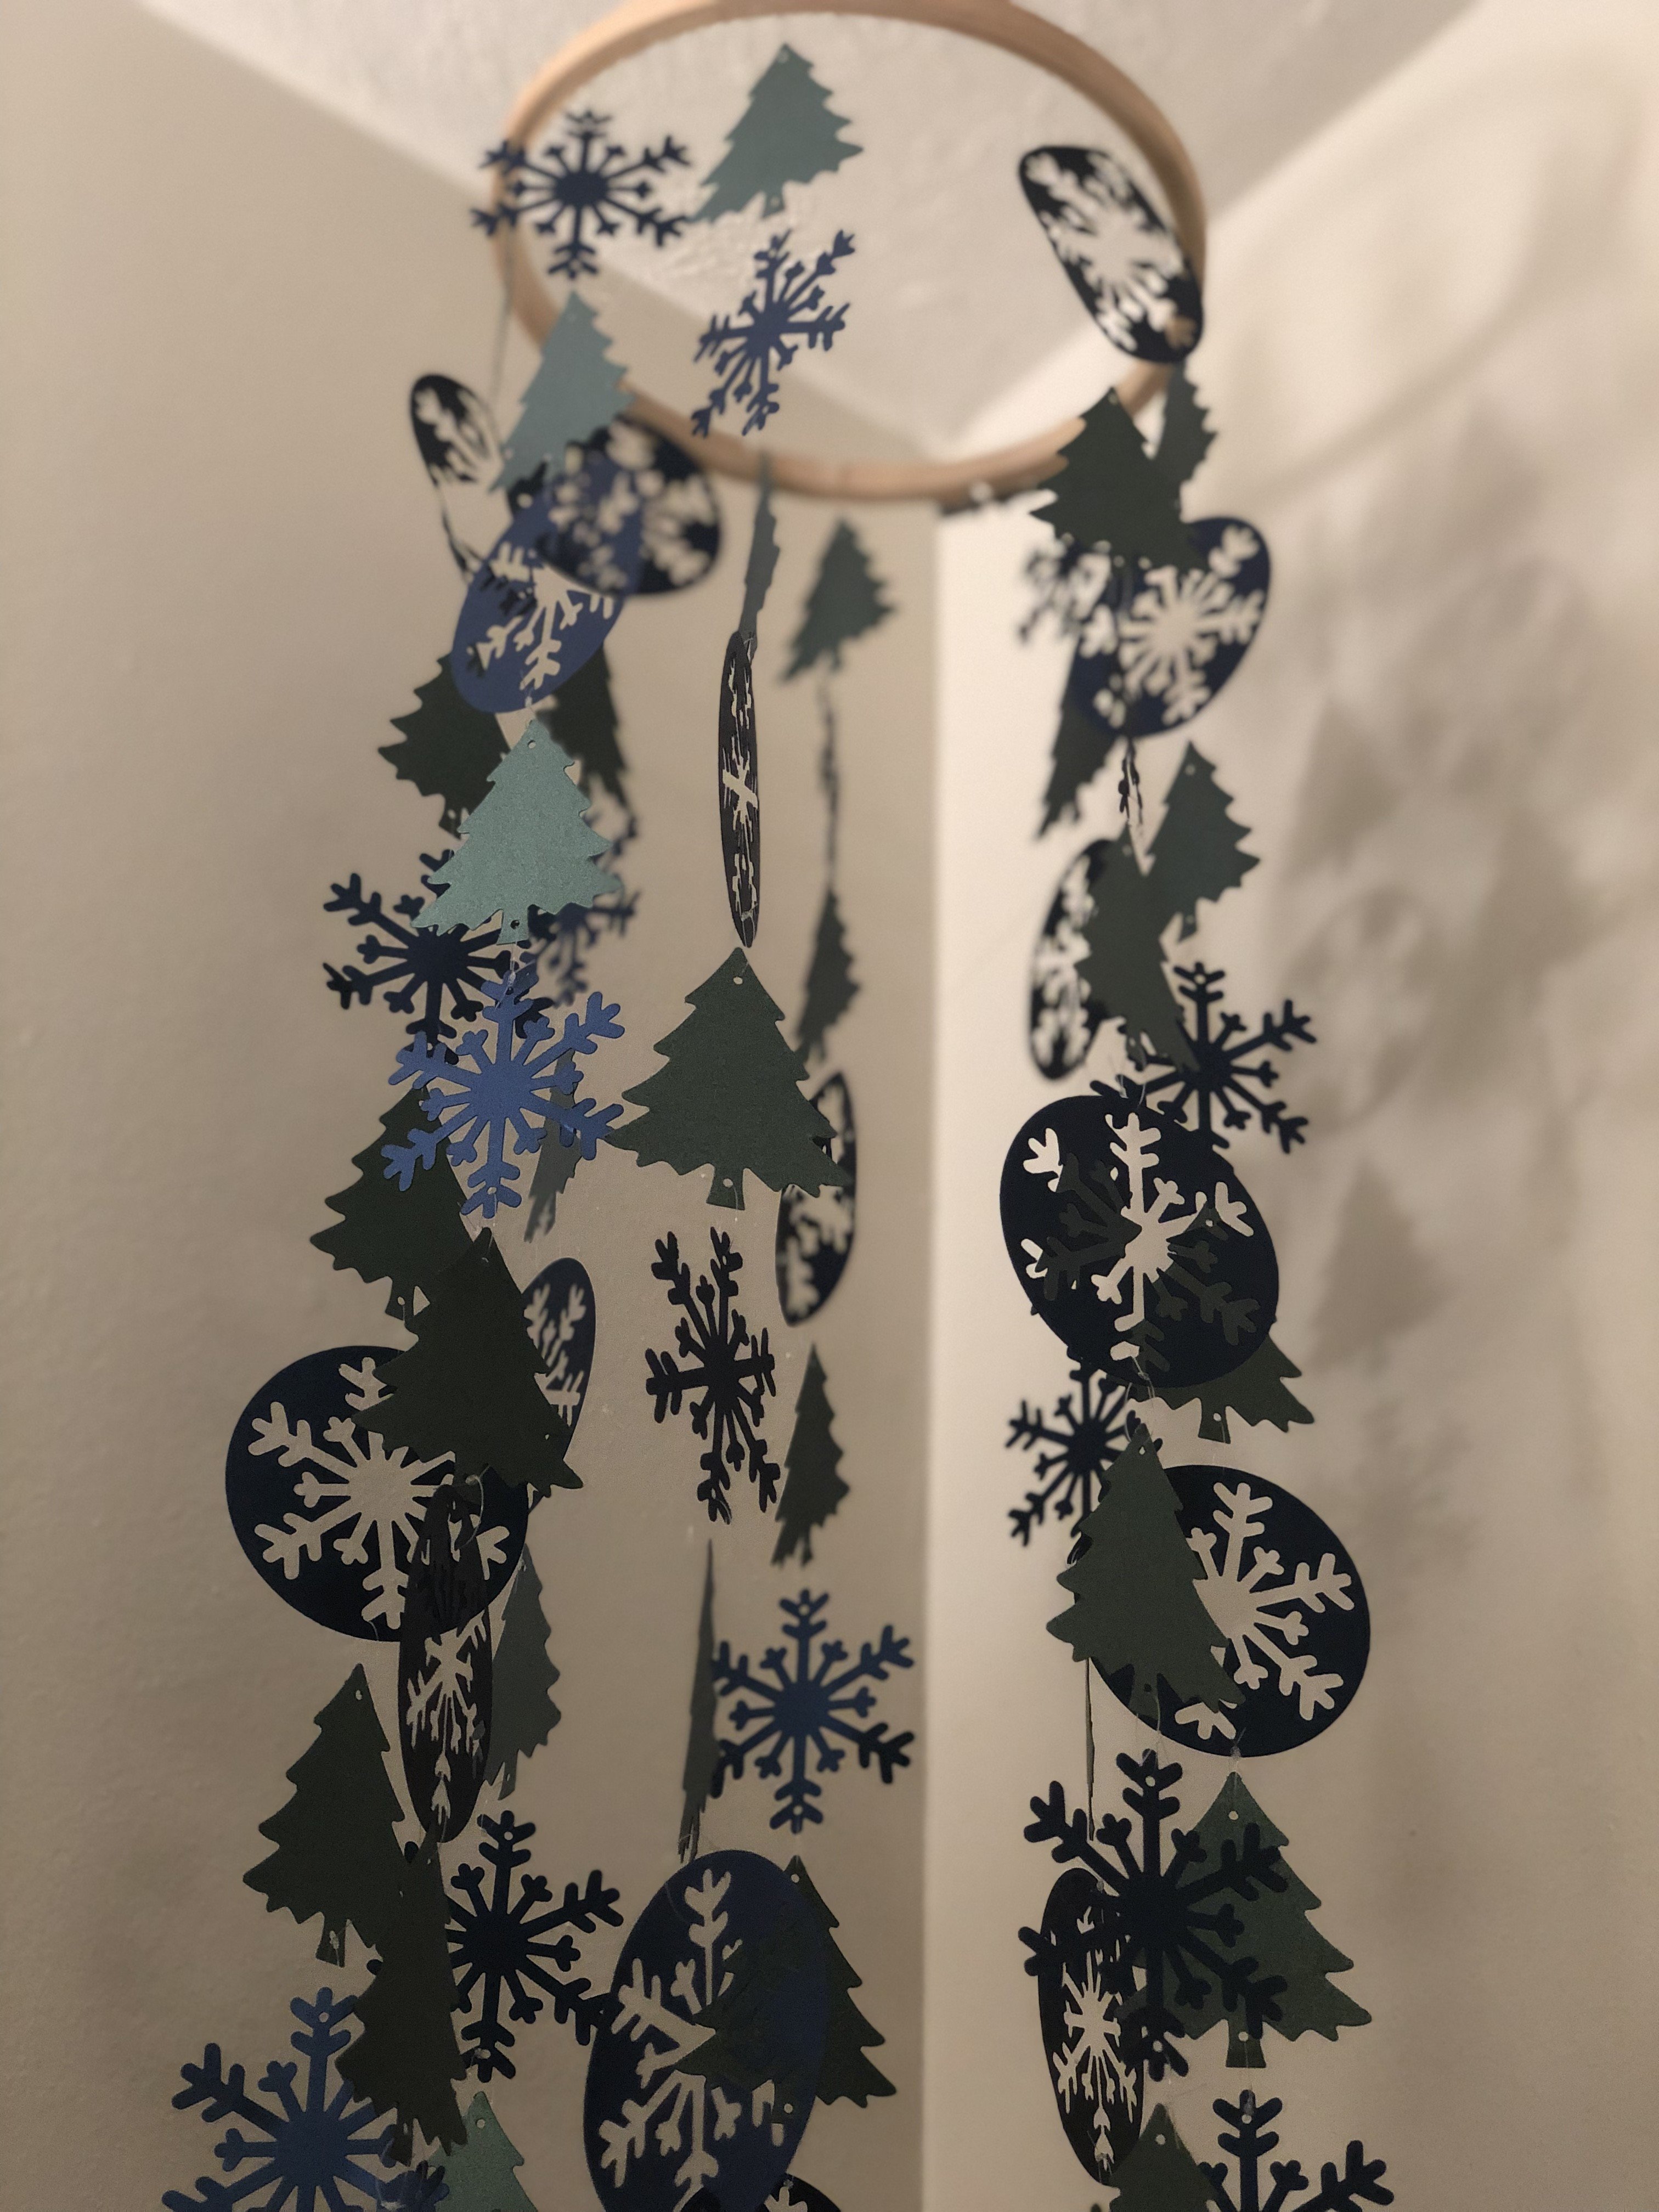
4. Use invisible/clear string (I used illusion cord) to connect the trees and snowflakes together with the pattern.
5. Connect sets of strings with illusion cord to a circle of some kind (I used an embroidery circle) and connect to the ceiling.
This project is very easy and almost anyone can join in the fun of making one. Create your own pattern or use the one that I made. Wishing you all a warm and happy winter season.
Have fun!
Materials required for Winter Paper Chandelier
- Shine Metallic
- Moss
- Blue Satin
- Tree Die Cut
- Snowflake Die Cut
- Mini hole punch
- Illusion cord
- Embroidery circle


Good job. It looks wonderful. It will cheer up a house in the winter. You are branching out and it is great idea.