How to Make an Origami Dragon – Step-by-Step Tutorial

Learn how to create a beautiful origami dragon with just a square sheet of paper. Follow these simple steps to impress your friends and family with your paper folding skills.
Origami Dragon – Folding the Paper
Welcome to this origami tutorial where I will guide you on how to fold a piece of paper to create a beautiful design. Follow these steps carefully to achieve the desired result.
Fold the Paper in Half Along Both Diagonals
To begin, take your square sheet of paper and fold it in half diagonally from one corner to the opposite corner. Crease the fold well and then unfold the paper.
Fold the Paper Horizontally and Vertically
Next, fold the paper in half horizontally from one edge to the opposite edge and then unfold it. After that, fold the paper vertically from one side to the other and then unfold it again.
Bring the Edges to the Middle to Create Flaps
Now, bring each edge of the paper towards the center crease, creating two flaps in the process. Make sure the edges align neatly at the center to form a symmetrical shape.
Fold Diagonals on Both Sides of the Paper
Fold the paper diagonally on both sides by bringing the corners to the center of the paper. Ensure that the creases are sharp and precise to maintain the symmetry of the design.
Open the Flaps and Inflate the Triangle in the Middle
Gently open up the flaps that you created earlier to reveal a triangle at the center of the paper. Carefully push and inflate the triangle outward to give it dimension and shape.
By following these steps and folding the paper with precision, you will create a beautiful design. Practice makes perfect, so don’t worry if it takes a few tries to get it just right. Enjoy the process and have fun crafting your origami masterpiece!
Shaping the Origami Dragon
Welcome to this origami tutorial where I (talents of: Easy Origami and Crafts) will guide you through the process of creating your very own paper dragon step by step. Let’s dive into shaping the dragon!
Step 1: Shape the Dragon’s Back
To begin, take your square sheet of paper and fold it in half along both diagonals. This will help establish the central lines for your dragon’s body. Next, fold the paper horizontally and vertically to create additional reference points.
Step 2: Create Wings
Now, it’s time to give your dragon wings. Fold the flaps on the sides of the paper to create the wingspan. This will add a majestic touch to your paper dragon and enhance its overall appearance.
Step 3: Fold the Head and Tail
With the wings in place, let’s focus on the dragon’s head and tail. Get creative and fold the paper to form unique variations for the head and tail. This step allows you to personalize your dragon and give it a distinct character.
Step 4: Bend the Corners for Legs
For the dragon to stand tall, you’ll need to create legs. Bend the corners of the paper to form sturdy legs that will support your origami dragon. This simple addition adds stability and a sense of movement to your creation.
Step 5: Adjust the Wings for Added Detail
To enhance the intricate details of your dragon, take a moment to adjust the wings. Play around with the folds and angles to add depth and dimension to the wings. This step will bring your dragon to life and make it visually captivating.
By following these steps and incorporating your own creative flair, you can shape a magnificent paper dragon that showcases your origami skills. Embrace the process, experiment with different folds, and enjoy the rewarding experience of bringing a dragon to life through the art of paper folding.
Origami Dragon – Final Touches
Alright, we’ve gone through the intricate process of creating our origami dragon from a simple square sheet of paper. Now, it’s time for the final touches to give our dragon that polished and proud look.
First things first, ensure all your folds are secure and in place. Run your fingers along each crease, making sure everything is neat and tight. This not only adds to the aesthetics but also helps your dragon hold its shape better.
Next, let’s flatten any remaining creases. A smooth finish will elevate the overall appearance of your dragon, giving it a professional touch. Gently press down on any visible creases using your fingers or a flat edge to create a clean and polished look.
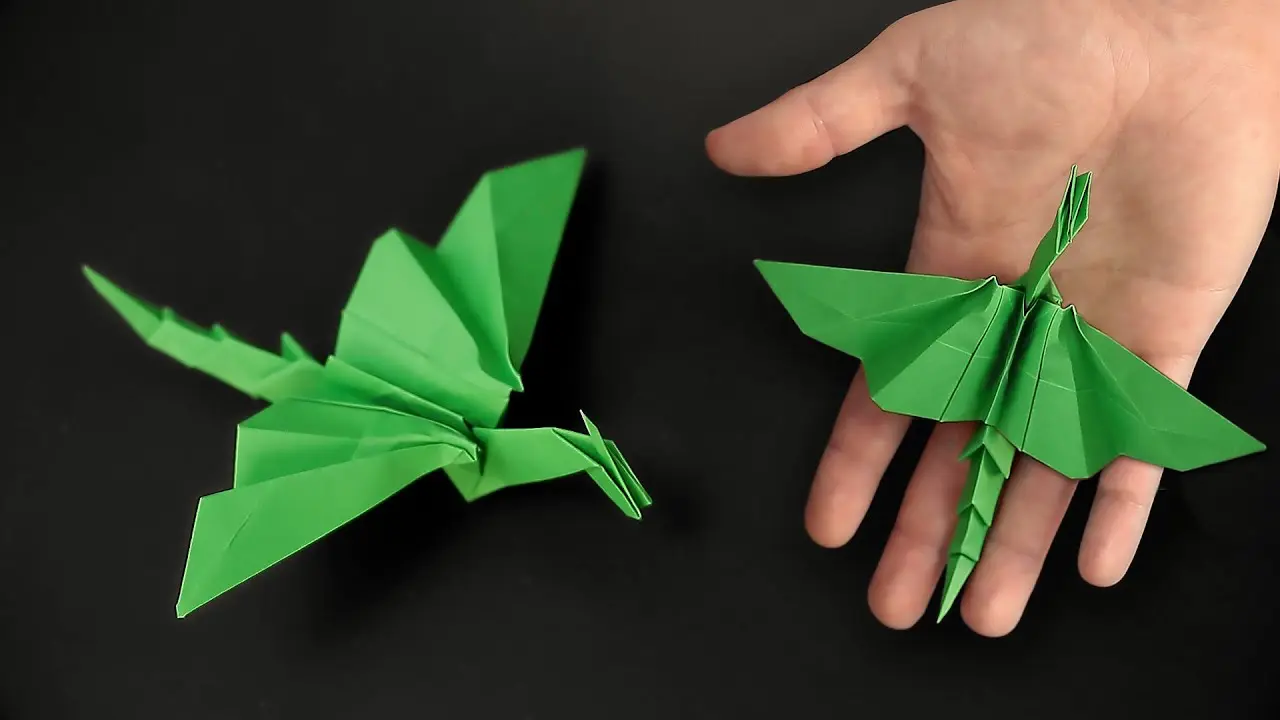
Now comes the exciting part – displaying your origami dragon proudly. Find a special spot where your creation can be showcased, whether it’s on your desk, a shelf, or anywhere you’d like to admire your handiwork. Let your dragon stand out and be a conversation starter!
Feeling inspired? Consider making more dragons in different colors. Experiment with various hues and patterns to create a whole origami dragon family. Each dragon can have its unique personality and charm, adding a touch of creativity to your collection.
Project by the talented hands of EasyOrigamiandCrafts
Lastly, a quick reminder – if you’ve enjoyed this origami dragon tutorial and want to explore more creative projects, don’t forget to like and subscribe. By staying updated, you can dive into a world of endless origami possibilities and enhance your crafting skills. Thank you for joining me on this dragon-making journey!
Origami Dragon: Secure all folds, flatten creases for a polished look, proudly display your origami dragon, create more dragons in different colors, and stay tuned for additional tutorials!